Making every hour count can be tough for carriers and their drivers. Finding and booking loads that are going in the right direction, at the right time, is often time consuming and frustrating. The Saved Lanes tab allows you to save your most frequently searched lanes, so that you can save more time when booking with Uber Freight.
Adding a Saved Lane
1) Login into the web portal.
2) To add a new lane, search for a load as you would on any normal search in the “Search tab”.
3) Just below the “Search” button, click on “Save this lane”.
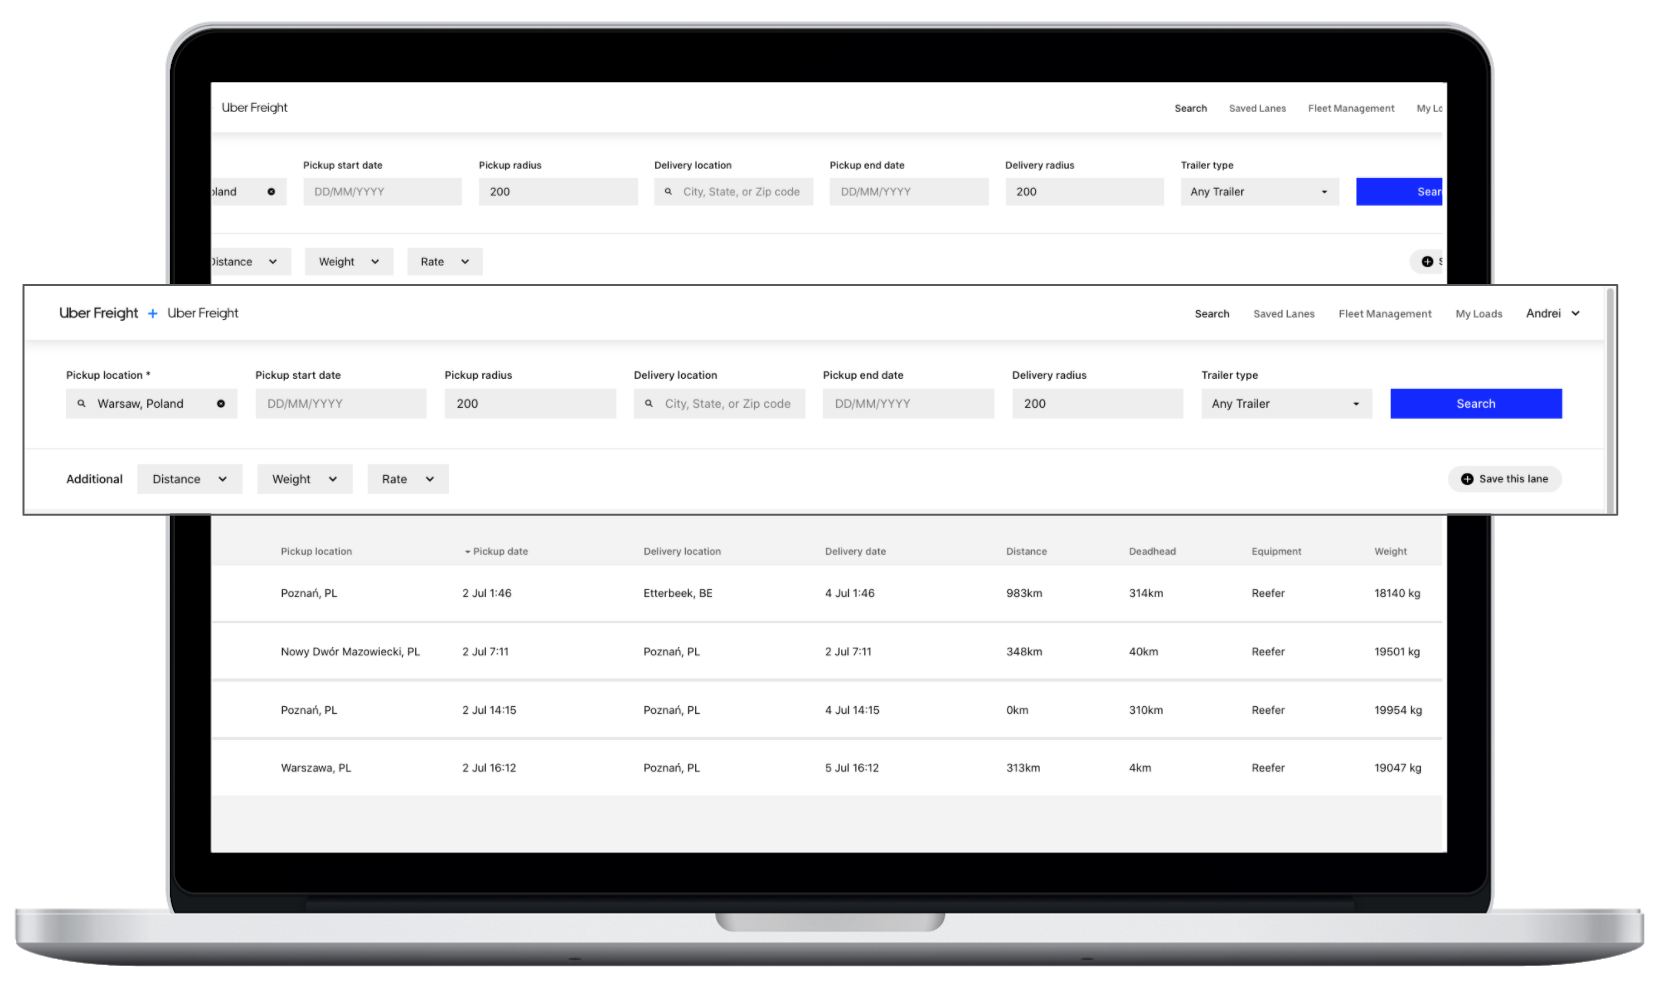
4) A pop up will appear where you can select the days of the week that you want to find loads on this lane.
5) Once you click “Done”, this will automatically add it to your saved lanes. To create a new lane, click the “+ New” on the top-left side. Enter the pickup location and pick up radius and click “Save”.
How Saved Lanes work
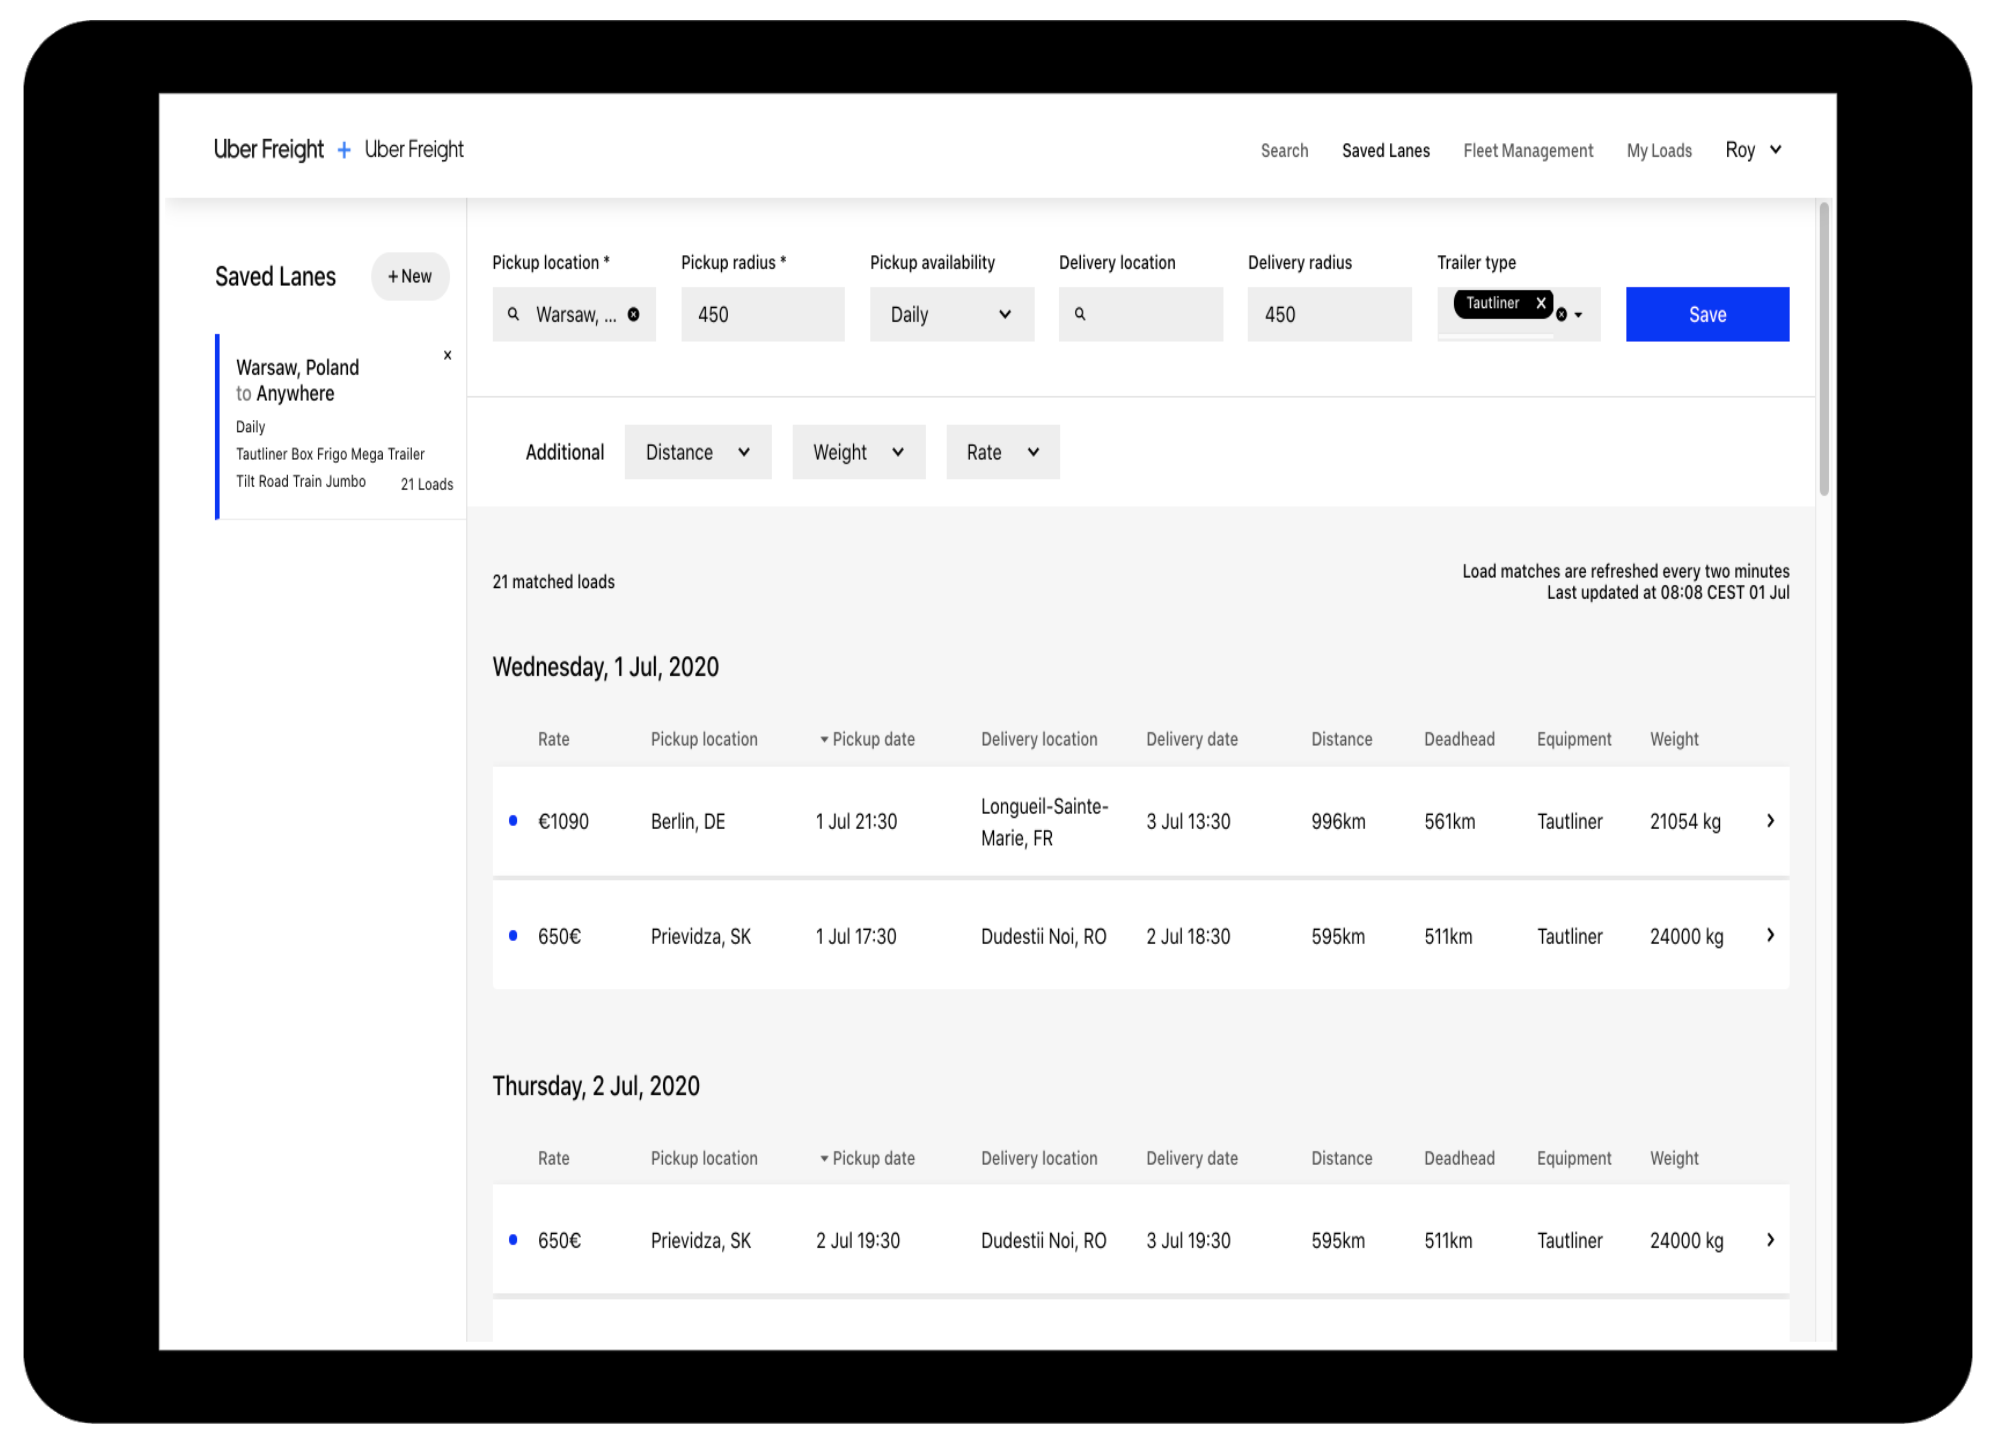
To see all your saved lanes, click “Saved Lanes” on the top menu bar.
Loads are automatically refreshed every two minutes. The number of relevant loads will appear in results on the right, with all your preferred lane saved searches shown on the left in alphabetical order of source location and delivery location.
New matches will be indicated with a blue dot. To learn more about a load, click on it and a new browser tab will open with all the load details. If you want the load, click “Book load.”
We’re always looking for ways to improve our products, and feedback from our users is instrumental, so if you have ideas or just want to learn more, get in touch today at freight-eu@uber.com.